X-Series IP (Ethernet) Network Step-by-Step Installation Guide
ATTENTION: DO NOT INSTALL the thermostat until you have all the necessary network information.
STEP 1: Install The Thermostat Backplate
Turn off the power to the HVAC unit and follow the detailed instructions included with the thermostat. Make sure the HVAC cable wires are connected to the correct terminals.
STEP 2: Connect Network Dongle To Thermostat

Align the included RJ45 network dongle to the connector shown on the diagram. This is a “keyed” connector and can only be installed in one orientation.
STEP 3: Connect Network Cable to Dongle
Route the network cable through the hole in the backplate and connect it to the dongle.

Step 4: Attach Thermostat Onto The Backplate
Follow the instruction guide to install the thermostat onto the backplate.
Step 5: Connect Thermostat to Network
Get Thermostat Name AND DHCP Address
Return power to the HVAC unit to power the thermostat. When the thermostat has successfully connected to the network, the Ethernet icon will appear.
1. Press and hold the bottom right corner of the display to enter the Device Info menu.
Write down the Thermostat Name. This is important if you are installing more than one thermostat.
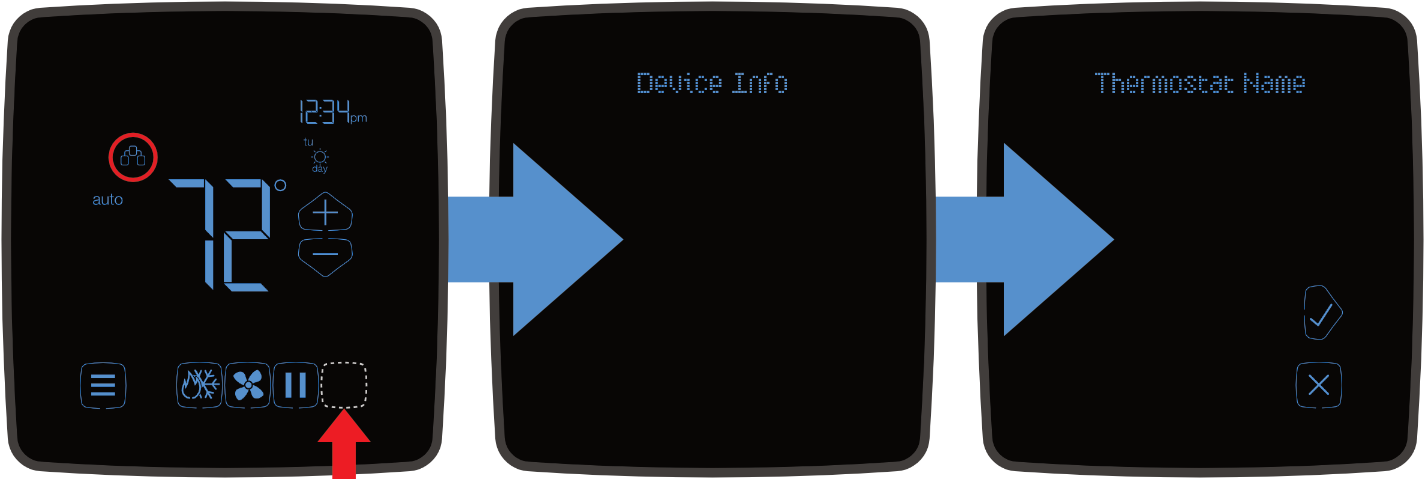
2. Press the right Checkmark button to advance to the IP Address.

Write down the IP address.
Press the Exit button to return to the default thermostat display.
Step 6: Configure Credentials
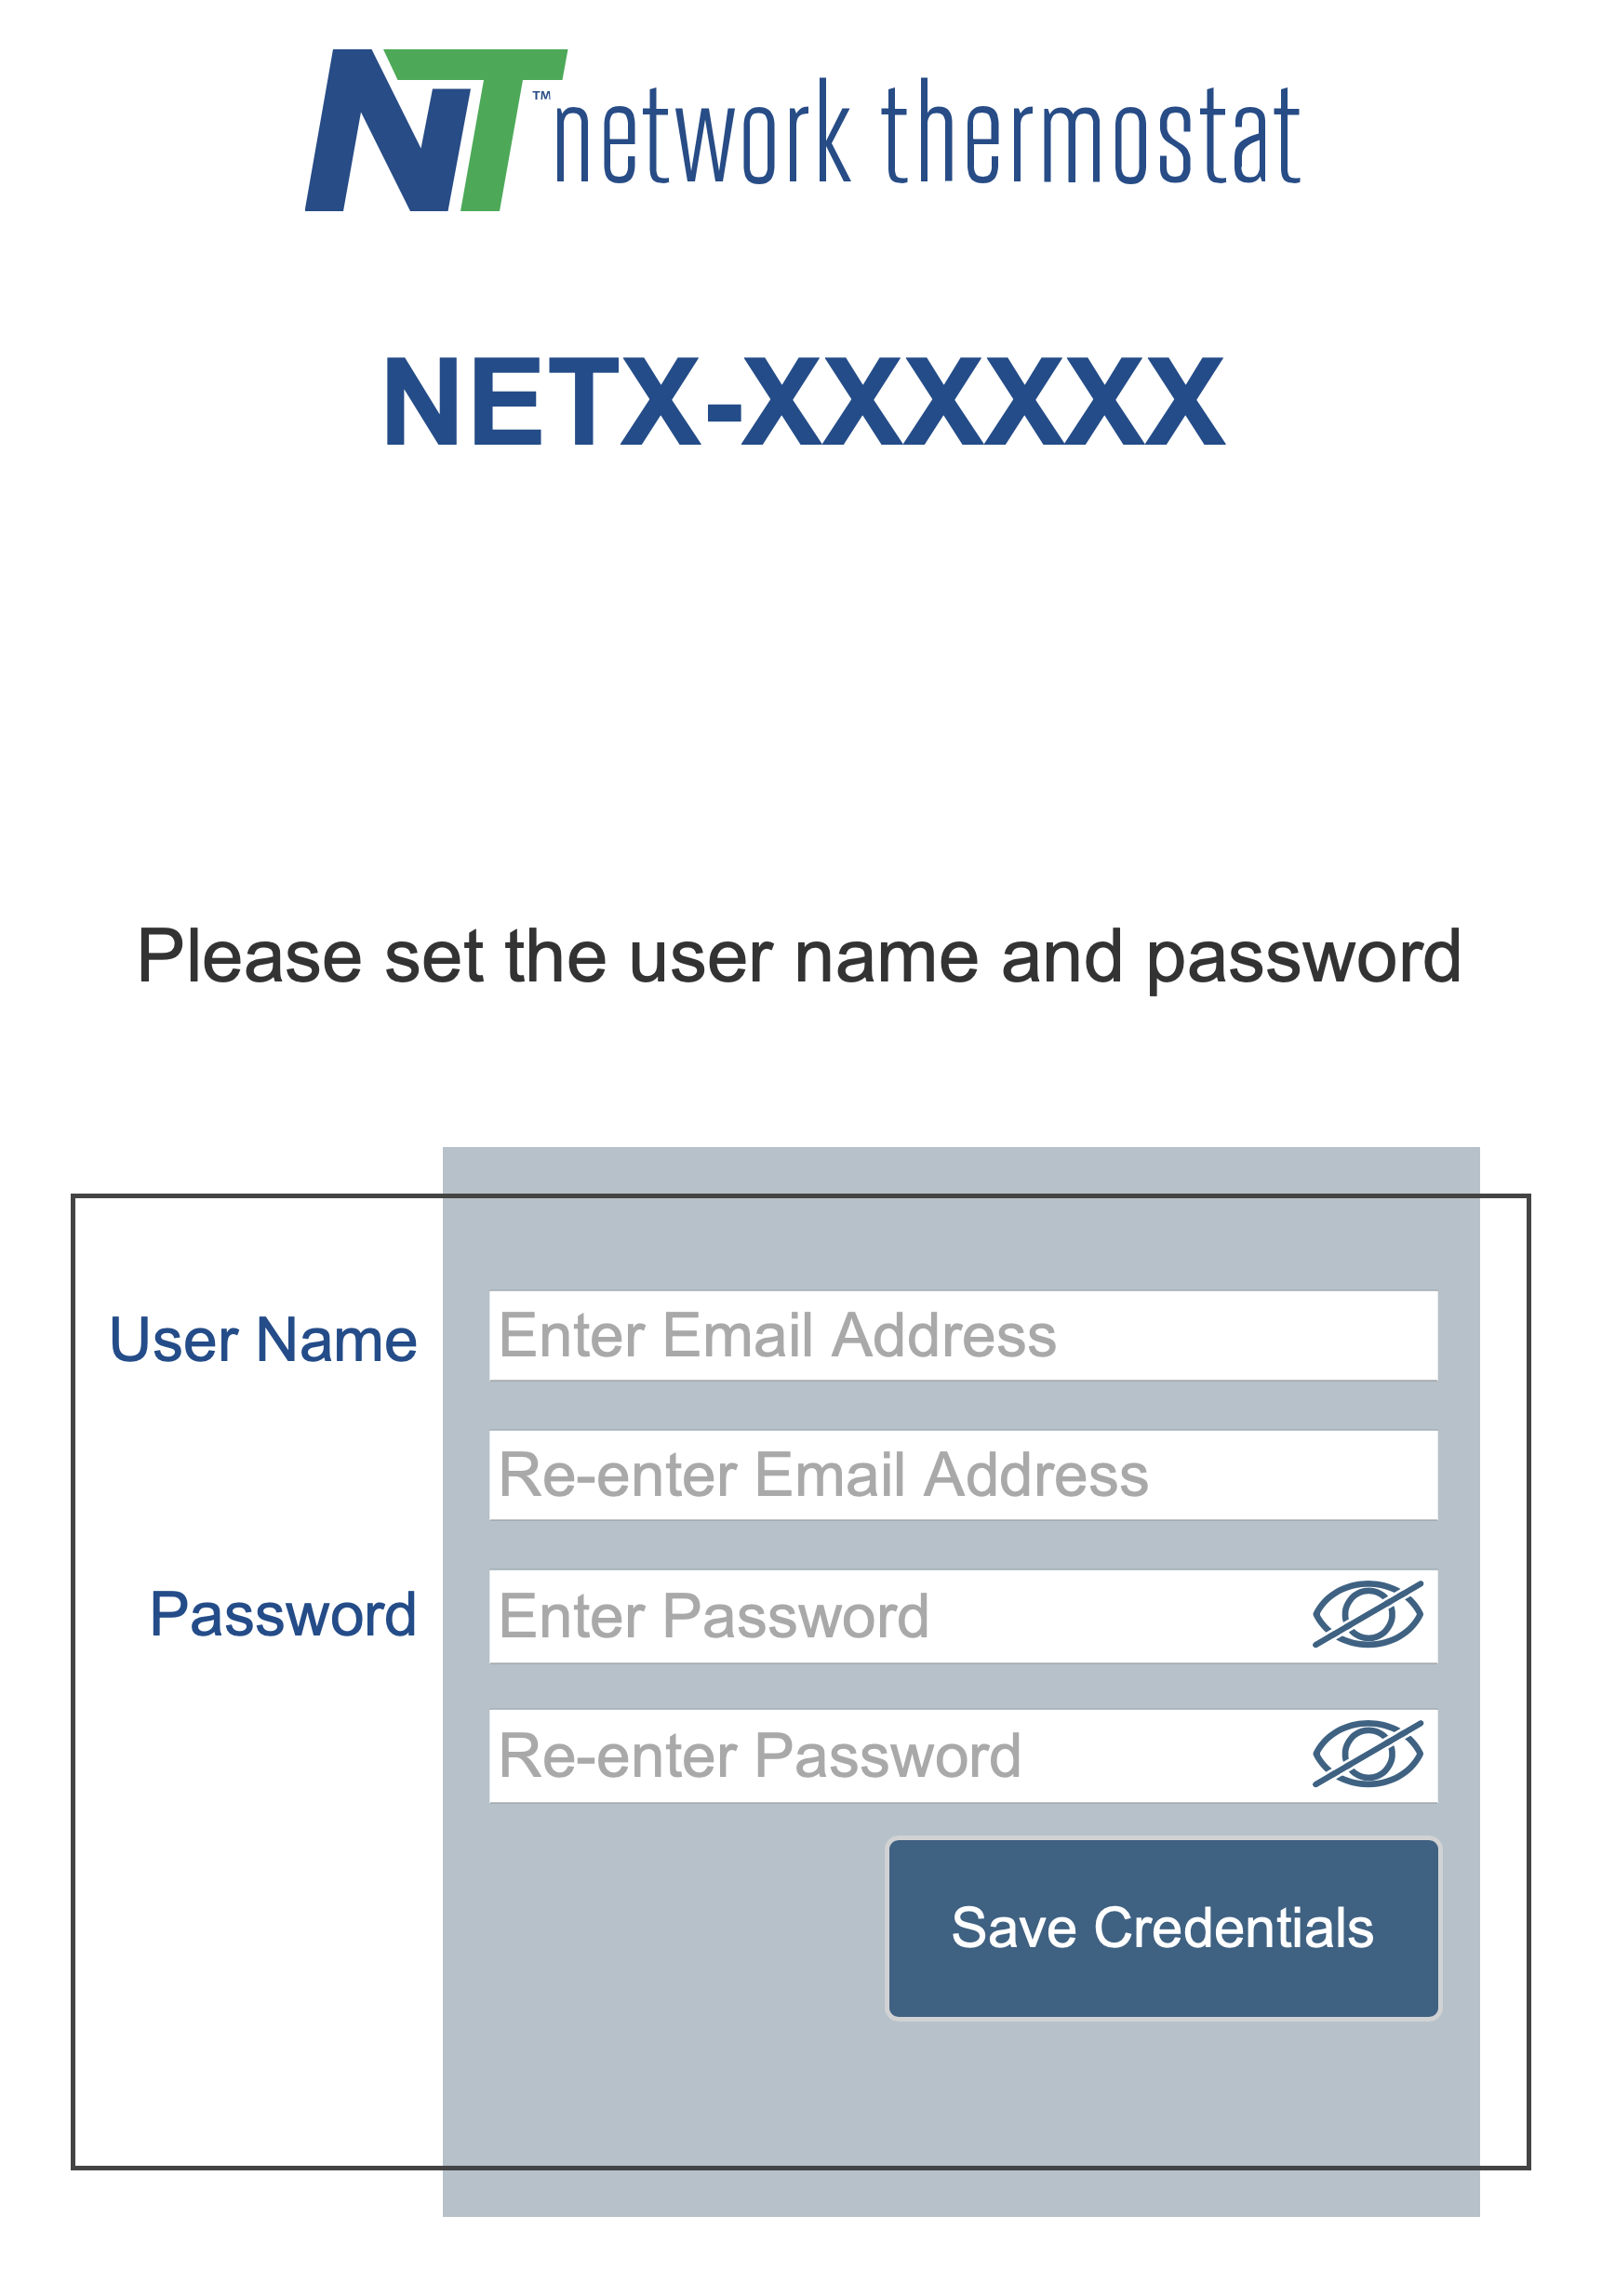
Using any computer, tablet, or smartphone connected to the same network as your thermostat, navigate to the IP address recorded in the previous step.
This page will prompt you to set a User Name (a valid email address) and Password. It is recommended that the email address used be monitored by whoever is managing the thermostat(s).
Click the "Save Credentials" button to save the information. Once saved, the page will refresh and prompt you to log in using the credentials that were just created.
Step 7: Log on To Thermostat Locally
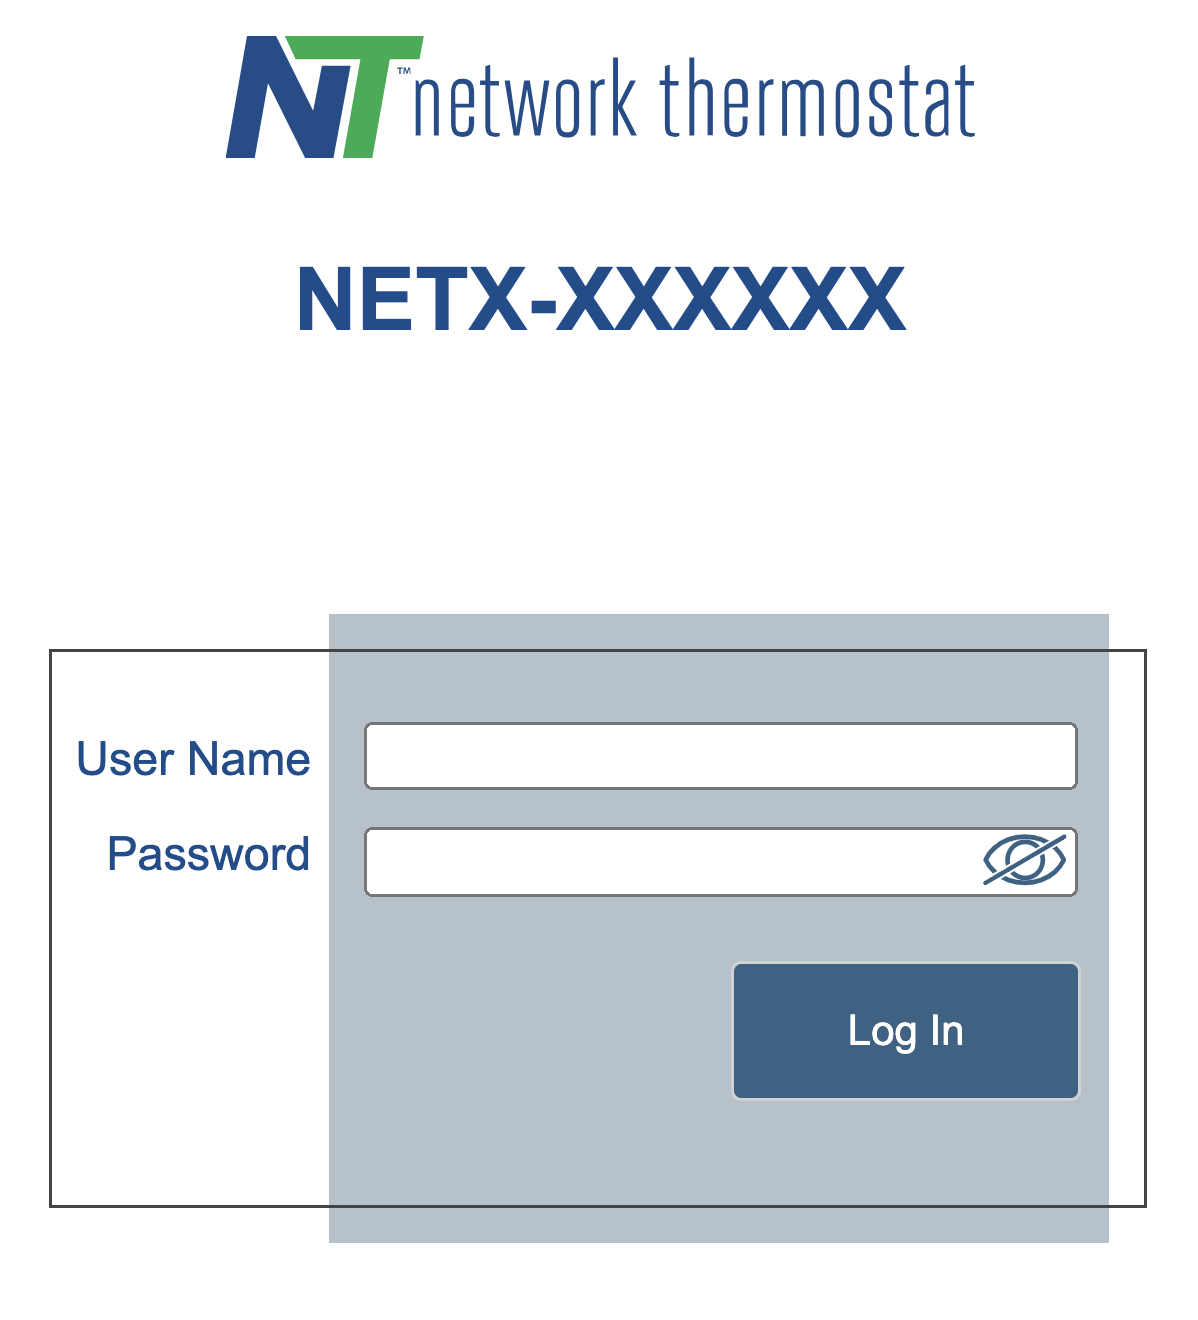
Enter the User Name and Password created in Step 6 and click “Log In”.
NOTE: For static IP configuration, proceed to Step 8.
Step 8: Update Network Settings on Thermostat
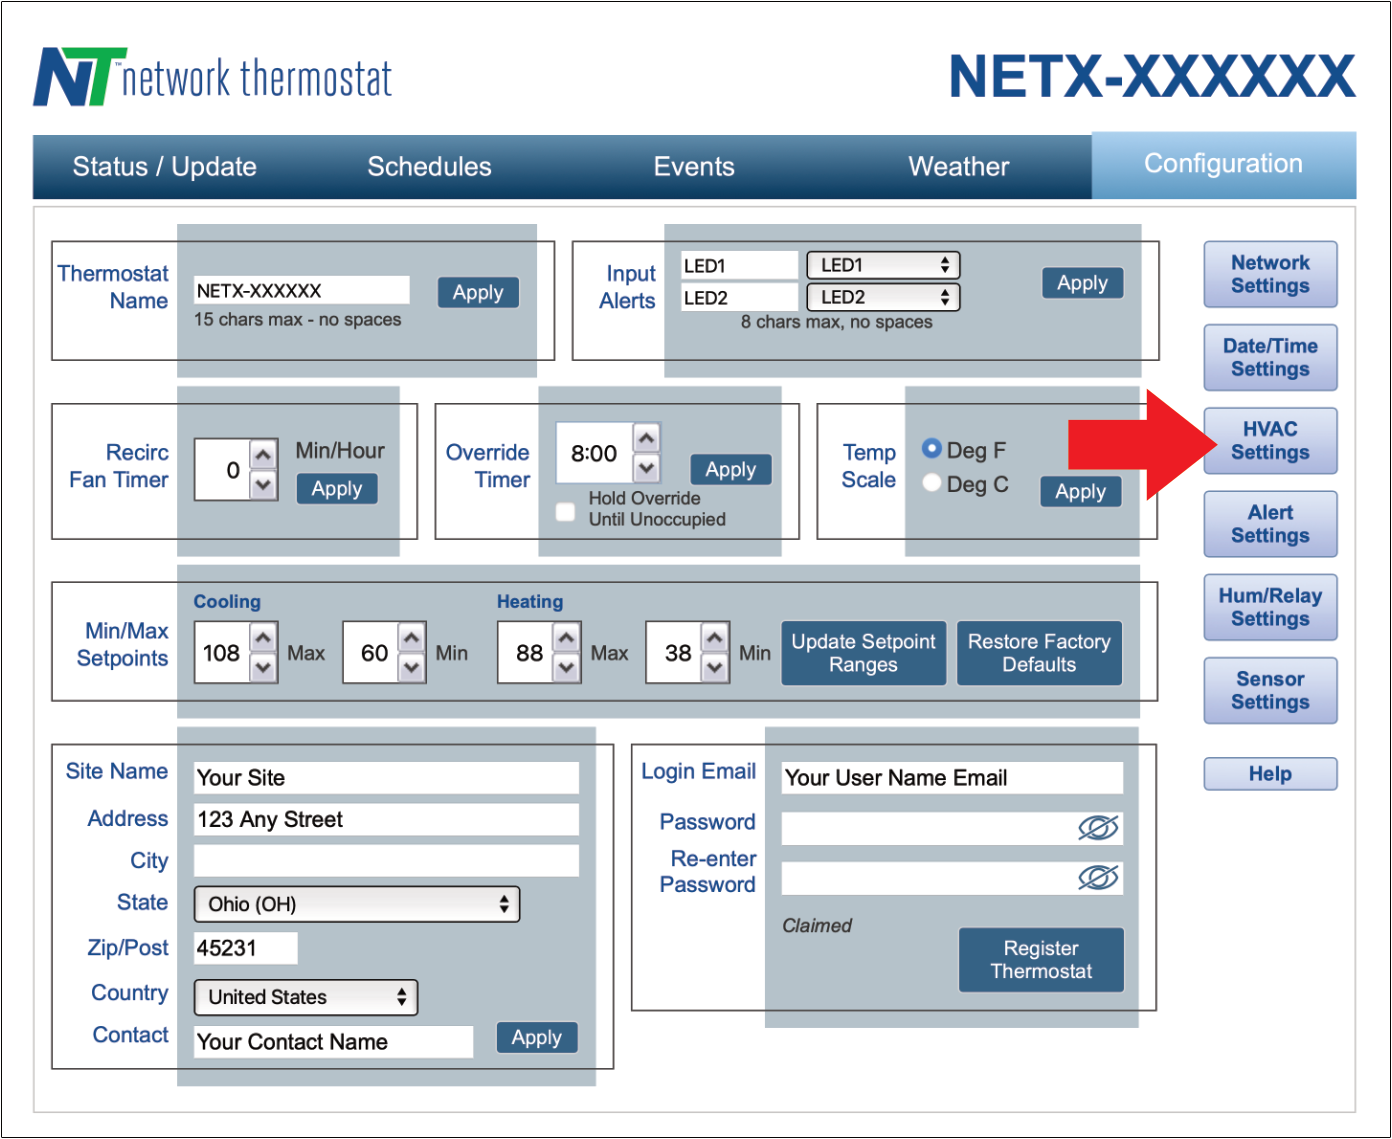
1. Click on the “Configuration” menu bar link on the upper right.
2. Click the “Network Settings” button on the right side of the page.
3. Un-check the “Enable DHCP” to set your static IP information.
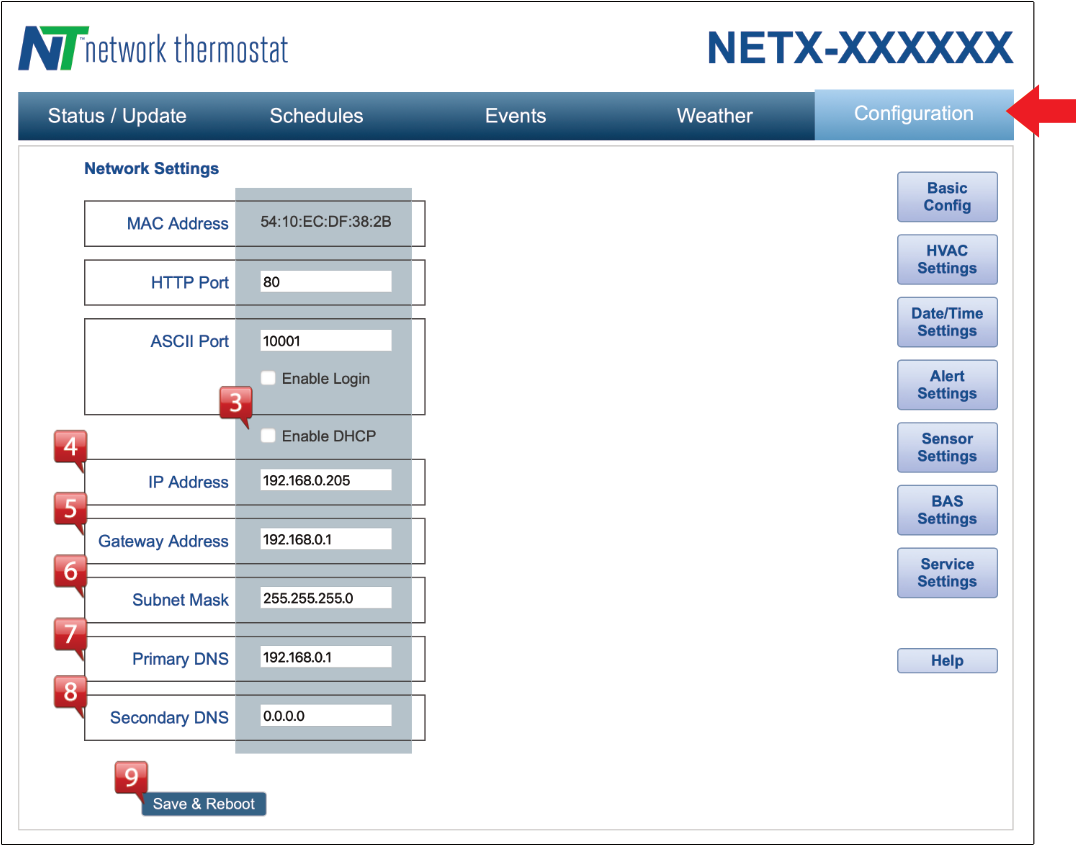
4 - 8. Add the static IP address of the thermostat, Gateway Address, Subnet Mask, Primary DNS, and Secondary DNS.
9. Click the “Save & Reboot” button.
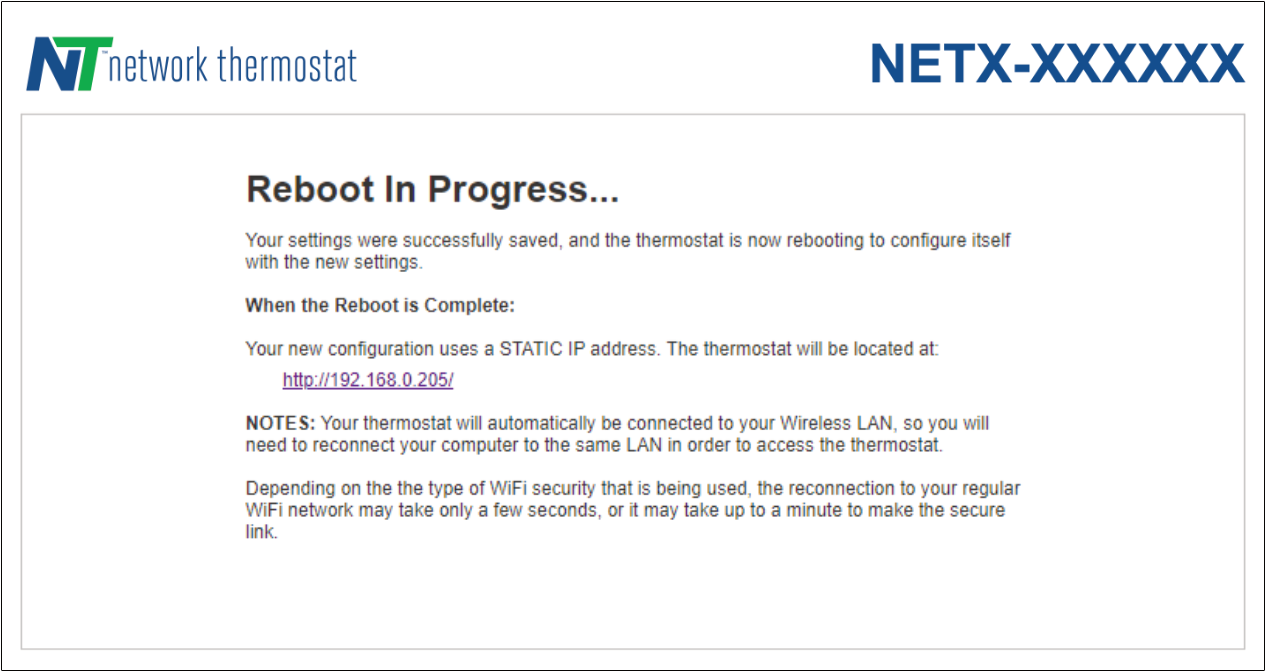
After your thermostat reboots, use your browser to navigate to the IP address set.
If you see the login page, you are all set.
If not, see Step 5 to obtain the current IP address and try again. Otherwise, see the Troubleshooting section of this manual.
Step 9: Connect To Your Thermostat
Connect via CloudConnect™
Using a desktop browser, go to the URL https://netx-cloud.com. Log in with the same User Name and Password you used in Step 6.
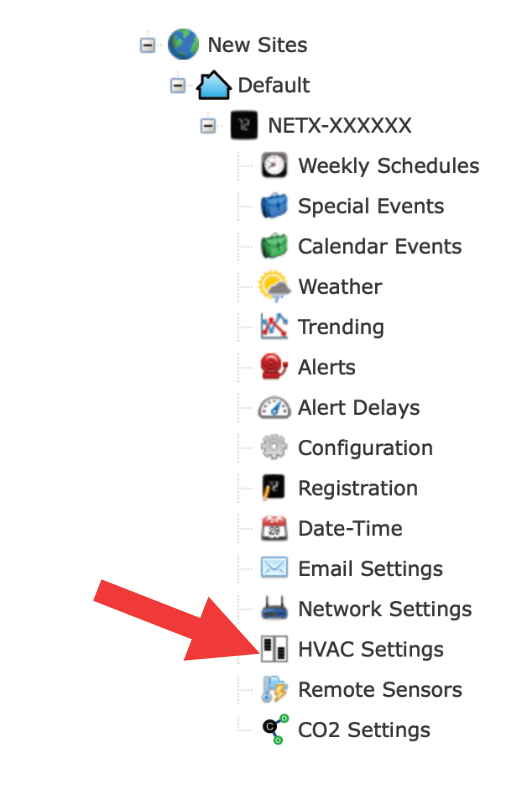
Once logged in, you will see a dashboard with your thermostats on the right and a drop-down menu on the left. Expand the menu under “New Sites” and/or “Default” by clicking on the “+” icon. Expand the thermostat menu with the thermostat name displayed in Step 5. Navigate to the Configuration page. Proceed to Step 10 for thermostat configuration.
NOTE: New Accounts are automatically enrolled with free CloudConnect™ for 30 days.
Connect Directly to Thermostat (embedded web server)
Go to the IP address you validated in Step 5 (DHCP) or Step 8 (Static).
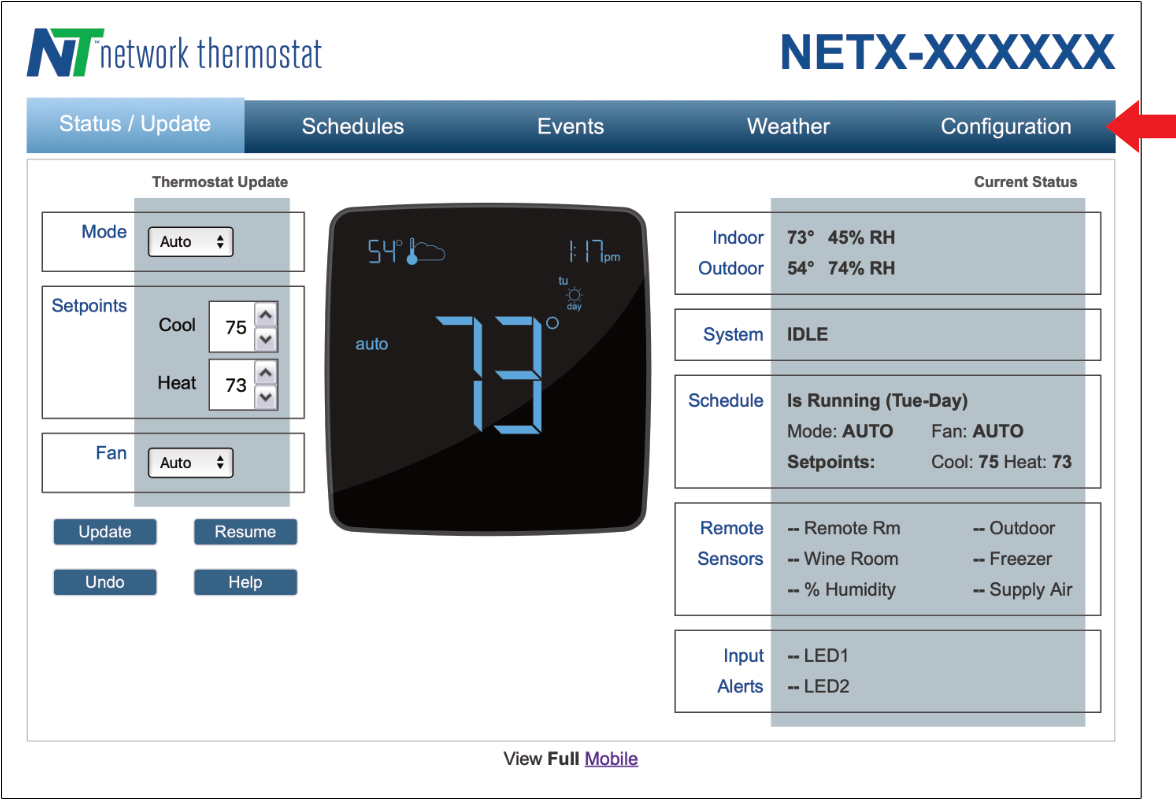
Log in to the thermostat. Click on the “Configuration” button.
Step 10: Edit your Thermostat Configuration
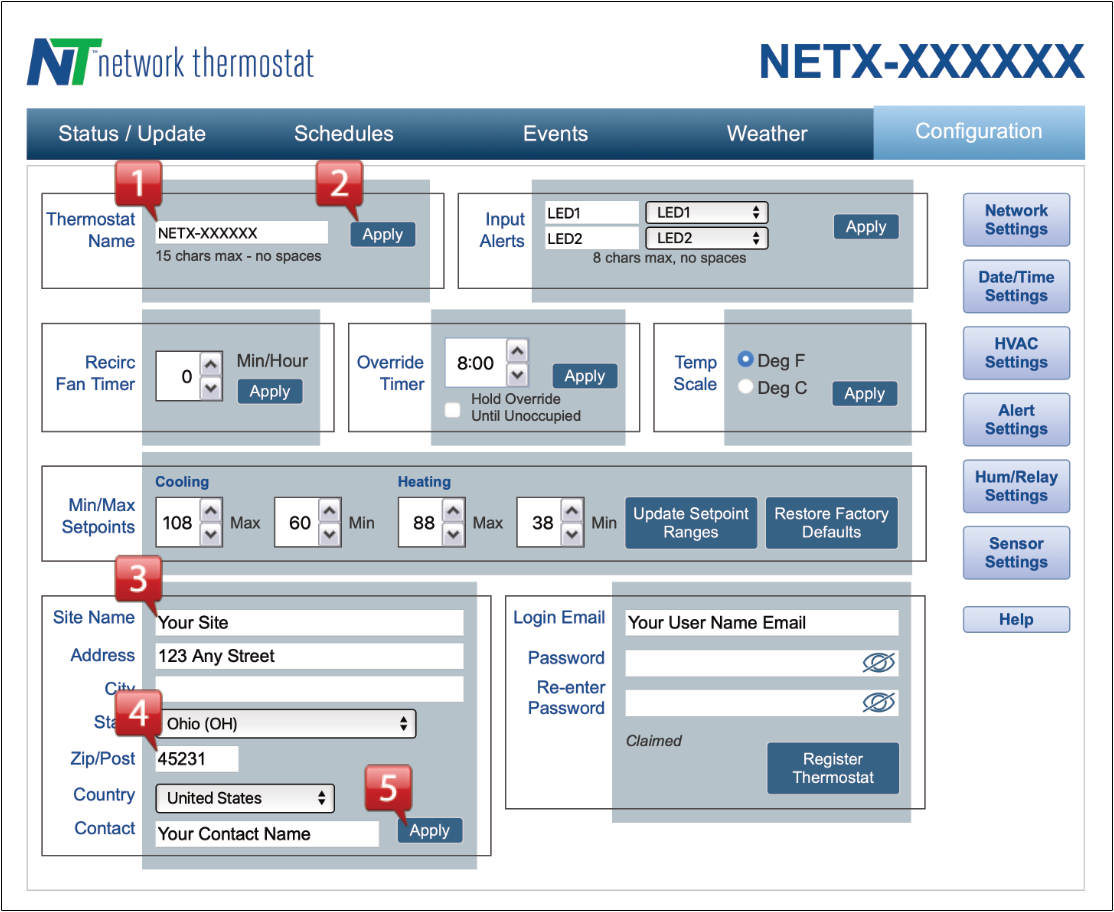
1. Enter a unique descriptive name in the “Thermostat Name” box.
NOTE: Thermostat names may have a maximum length of 15 characters with no spaces.
2. Click the “Apply” button for the thermostat name to be saved.
3. Enter the “Site Name”.
4. Enter your address with your Zip Code. (Adding the Zip Code is Required for the thermostat to access your current weather and forecast information)
5. Click the “Apply” button.
6. Make any additional adjustments as needed.
ATTENTION: Make sure to click the appropriate Apply button located in the same block as the parameters you have adjusted.
The thermostat will not update its parameters unless the appropriate “Apply” button is clicked.
Step 11: Configuring HVAC Settings
Navigate to the HVAC Settings of the thermostat.
For CloudConnect
Expand the thermostat name and click on the “HVAC Setting” icon.
For Direct Connect
Click on the “Configuration” menu button, then click on the “HVAC Settings” button on the right side of the page.
Configure the HVAC Settings to match your HVAC equipment operation.
Reset Modes
There are four reset modes. All reset modes are reached via the touchscreen. To access the Reset Menu, press the MENU button for 5 seconds until the Installer Menu display is activated.
Press the Checkmark button and cycle through the Installer Menu until you reach the Exit Menu screen.
Press the Up arrow for Reset Options. The reset options are listed below.
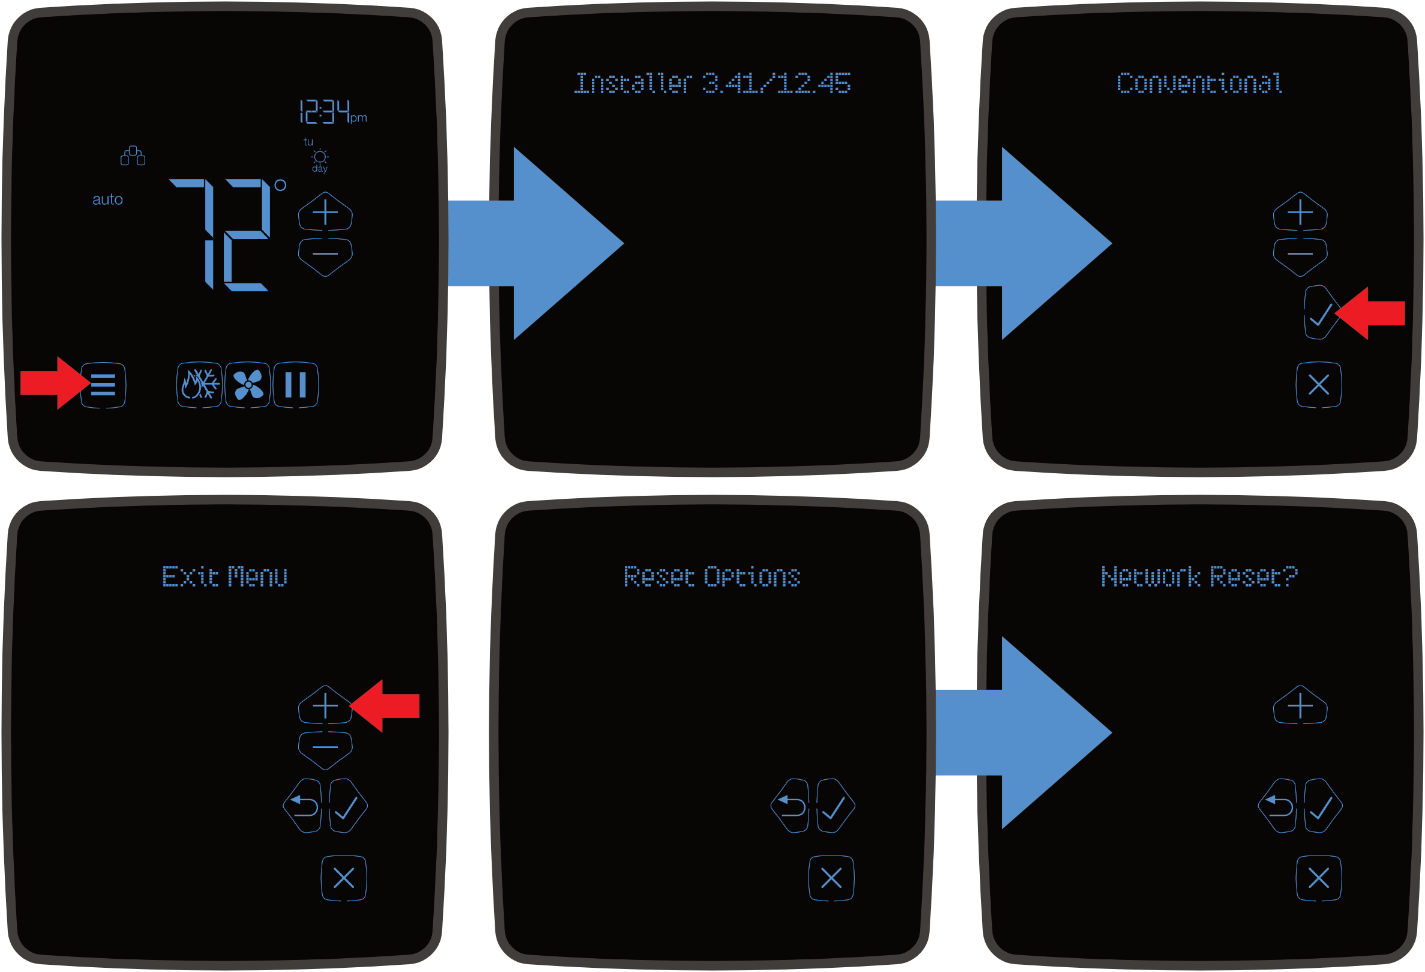
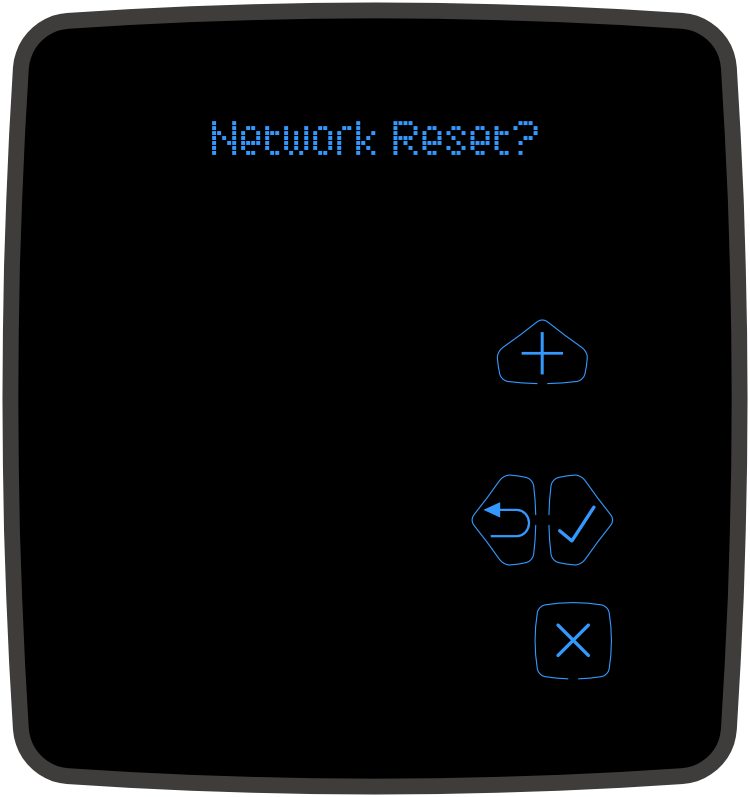
Network Reset
This will reset all network settings back to factory defaults. The User Name, Password, and HVAC settings will remain unchanged.
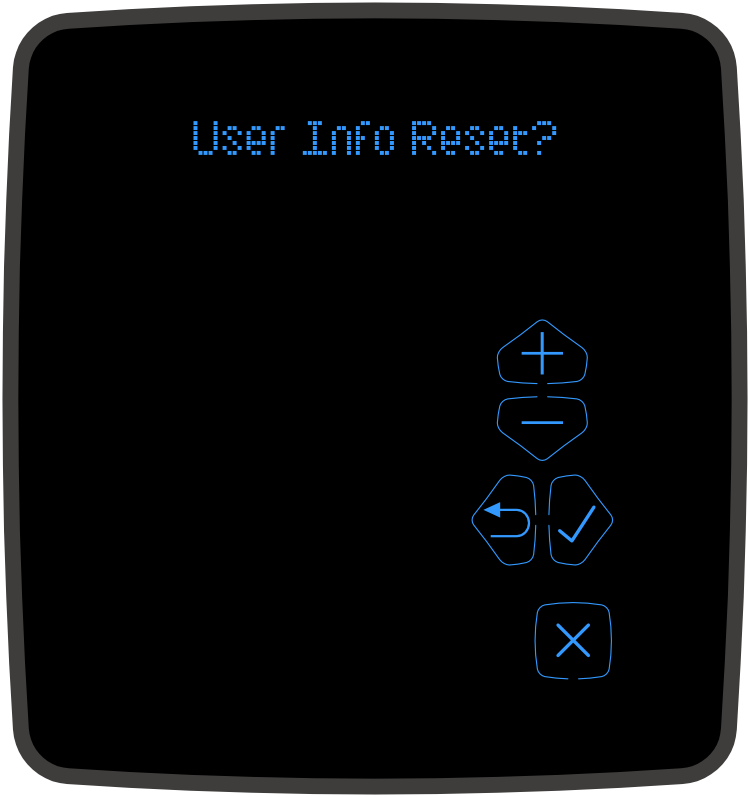
User Info Reset
This will reset the User Name and Password to factory defaults. User info reset will reset login credentials, BAS settings, events, time settings, site info, device name, alerts & email/text settings, sensor names, aux relay control settings, and config services selection. The Network and HVAC Settings will remain unchanged.
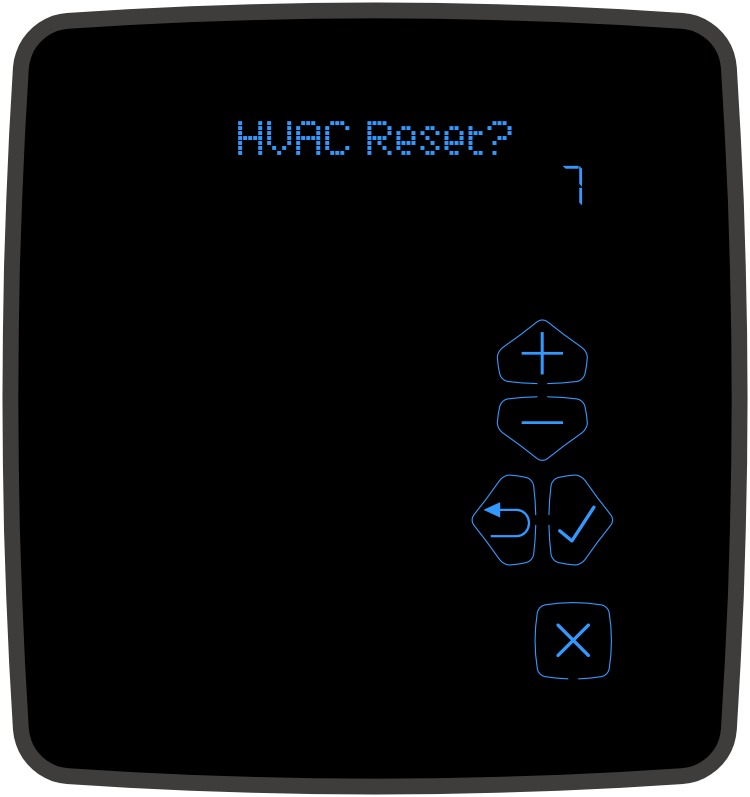
HVAC Reset
This will reset all HVAC settings, schedules, and configurations back to the factory default settings. The Network and User Info settings will remain unchanged.
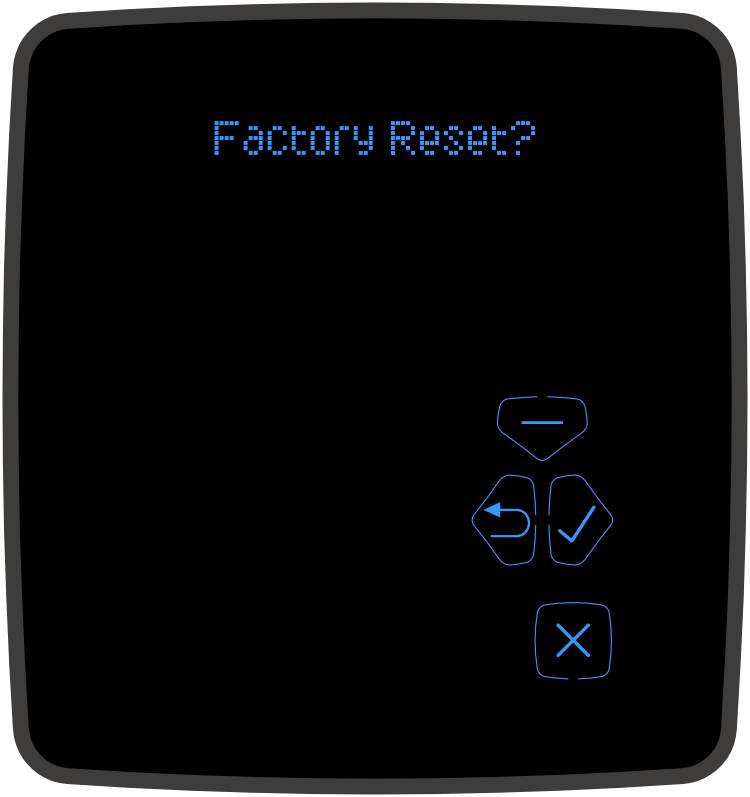
Factory Reset
This will reset the entire thermostat back to the factory default settings. All settings will be erased.
Troubleshooting
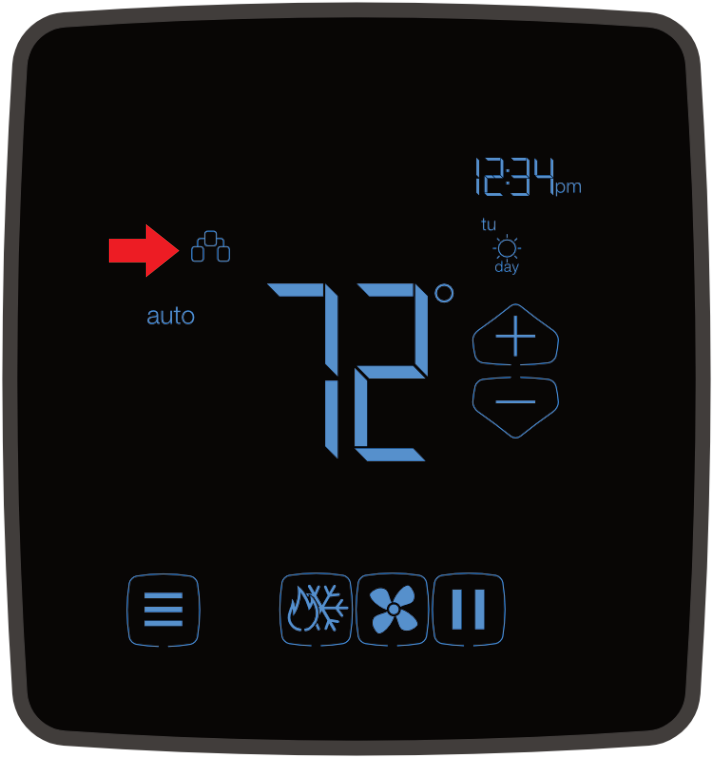
If you are having trouble communicating with the thermostat, the first thing to check is the network connection status. This is done from the faceplate. There are three possible conditions.
Condition 1: Solid Network Icon
The thermostat is connected to the network and has established an IP address.
Condition 2: Blinking Network Icon
The thermostat is connected to the network but has not resolved an IP address. This only applies to thermostats when the thermostat is set to DHCP mode.
Condition 3: No Network Icon
The thermostat is NOT connected to the network.
NOTE: If Condition 2 or 3 exists, first start by checking your network cabling. If the problem persists, check with your network administrator. If all is in proper order, refer to the Network Reset section of this manual.